Documentation Index
Fetch the complete documentation index at: https://docs.textyess.com/llms.txt
Use this file to discover all available pages before exploring further.
Navigate to the configuration page
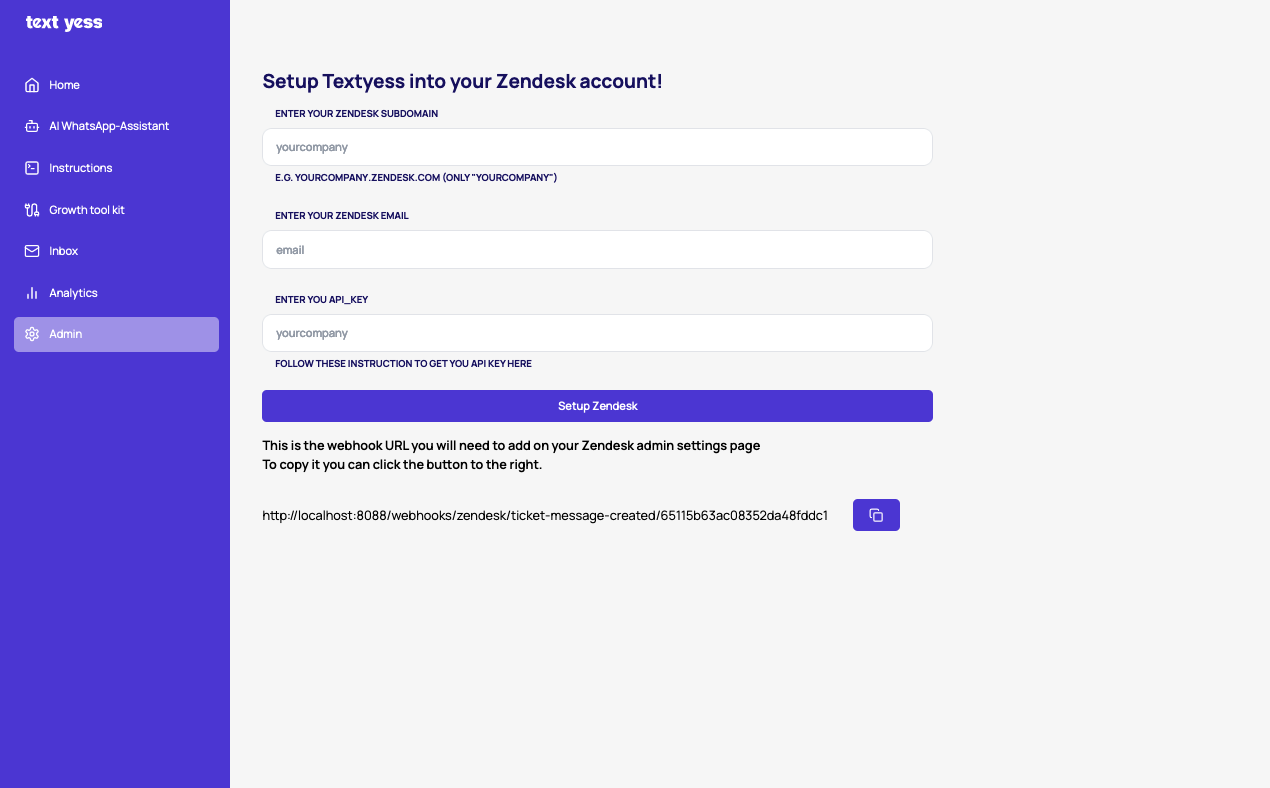
The first step is to connect your Zendesk account to TextYess.Open the Zendesk Integration page inside TextYess by navigating to https://ai.textyess.com/integrations/zendesk.
Create the API token
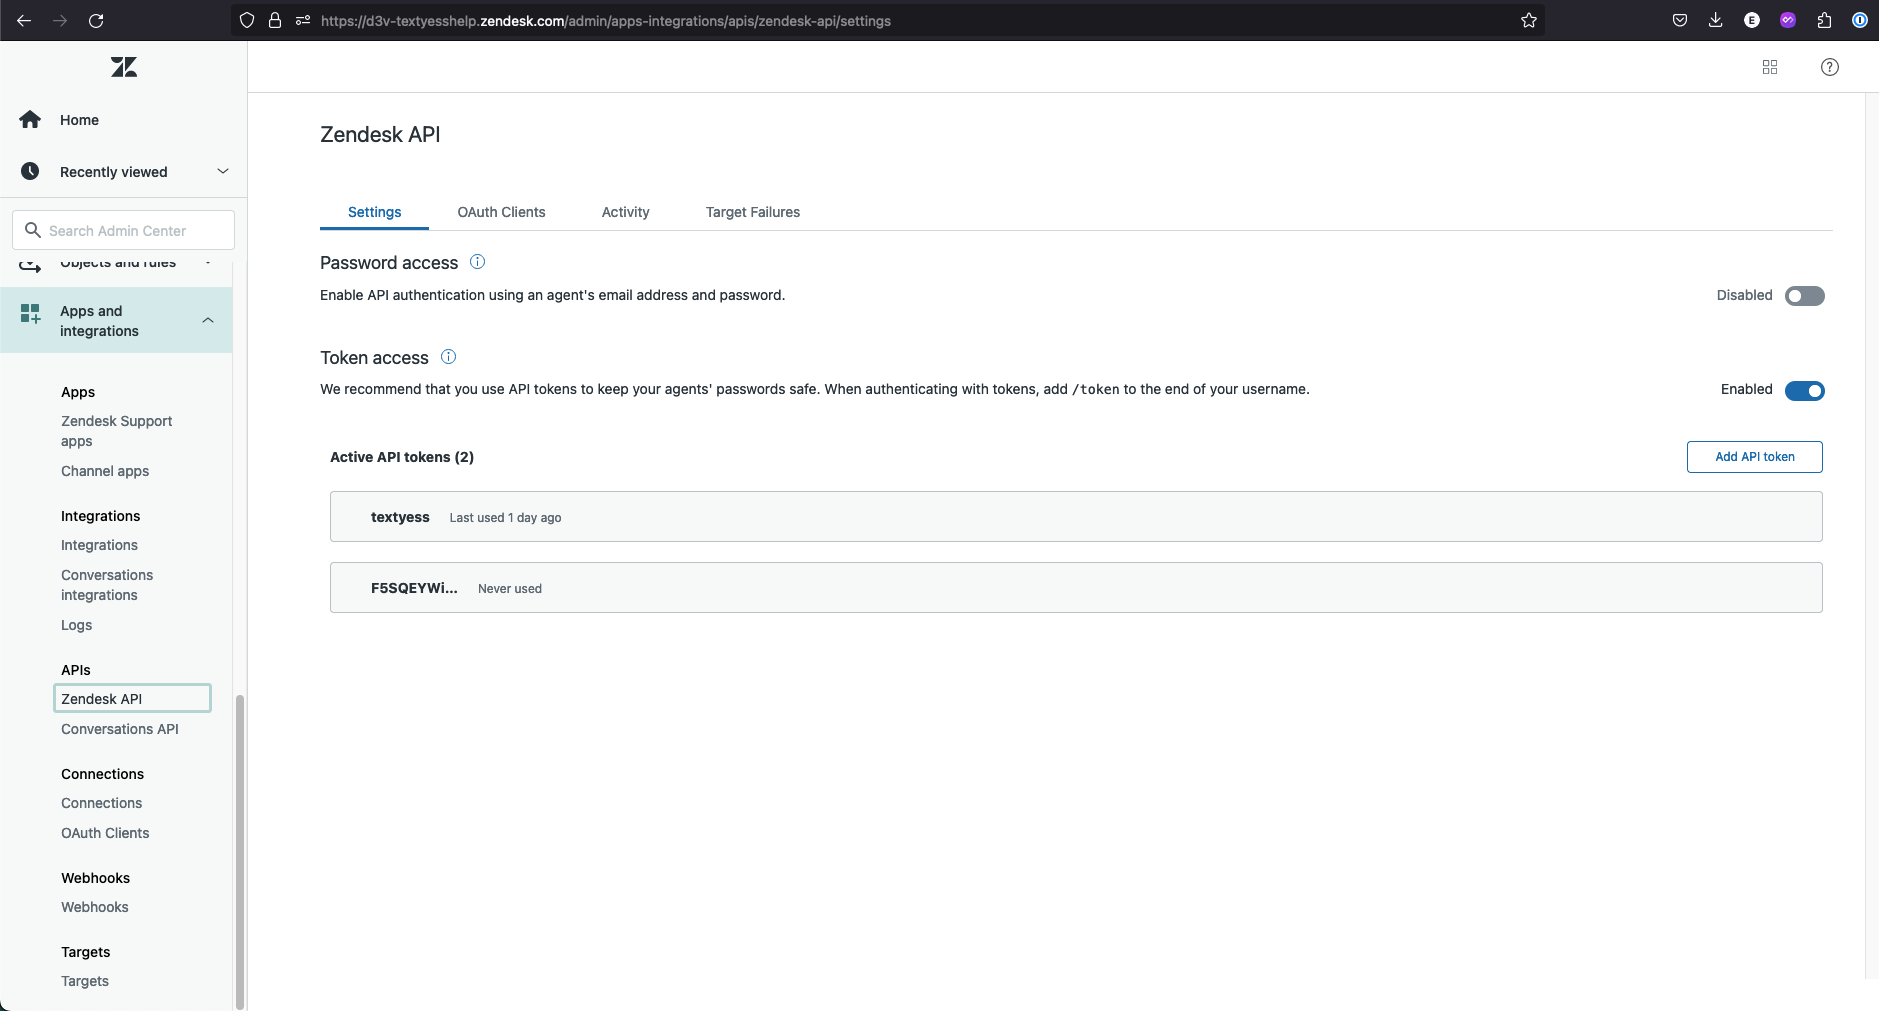
- In Zendesk, click the Admin (gear icon) on the left sidebar.
- Go to Apps and Integrations → API → Zendesk API.
- Make sure the checkbox for “Allow API token access” is enabled.
- Under API Tokens, click Add API token.
- Add a name for the token, for example “TextYess Integration.”
- Click Copy to save your token somewhere safe — Zendesk will only show it once.
- Go back to TextYess → Integrations → Zendesk.
- Paste your Zendesk domain, admin email, and API token, then click Setup Zendesk.
This will allow us to:
Create a TextYess view
The app will automatically create a view named “TextYess” where all new conversations with the AI agent will be visible
On every new WhatsApp conversation:
- TextYess automatically creates a customer in Zendesk with:
- Email:
zendesk_<phonenumber>@textyess.com - Their phone number attached to their profile
- Email:
- A ticket is created with status: “solved.”
This indicates the AI is actively managing the conversation. - If the customer replies, Zendesk automatically reopens the ticket as “open.”
The AI detects the new message and sends a response. - After the AI responds, the ticket is automatically updated back to ”solved.”
- If a human agent sends a message to the customer from Zendesk, the AI immediately stops replying, , and the conversation is handled exclusively by the support team.
Multi-account setup (multiple TextYess organizations)
If you connect multiple TextYess organizations (e.g. different markets) to the same Zendesk instance, each organization needs its own webhook trigger so that replies are routed to the correct WhatsApp account.How it works
Each TextYess organization automatically tags its tickets with:textyess_orgid_{organization_id}— a unique, stable identifier for the organizationtextyess_org_{company_name}— a human-readable label (e.g.textyess_org_velasca_uk)
organization_id in the webhook URL shown on each TextYess organization’s Zendesk integration page.
Step-by-step
- In Zendesk, go to Admin → Objects and rules → Business rules → Triggers.
- For each TextYess organization, create a trigger:
- Name: e.g. “TextYess - Velasca UK”
- Conditions (Meet ALL):
Tags→Contains at least one of the following→textyess_orgid_{organization_id}Comment→Is→Public
- Actions:
Notify webhook→ select the webhook for that organization’s URL
- If you previously had a single trigger for all TextYess tickets, update it to use the org-specific tag, or disable it and create per-org triggers.
Important notes
- Only new tickets created after connecting will have the org tags. Existing tickets are unaffected.
- The
textyess_orgid_tag is the recommended tag to use in trigger conditions because it is stable. Thetextyess_org_tag is for readability and may change if you rename the organization.